In previous posts, we have developed the function to capture the members' information and their transaction history into the system. However, the UI is too basic and may not be user friendly enough for our cashier.
What we are going to do next is to enhance the user interface for our cashier who is going to use it on their day-to-day basis. We'll introduce a function to allow the cashier to search for a member by ID, and register multiple transactions in one go.
1 - Searching Member by ID
Imagine a customer walks in to the store with a member ID. Upon checking out at the counter, the customer shares his member ID to the cashier, and cashier needs to look up this member in the system before registering the transactions.
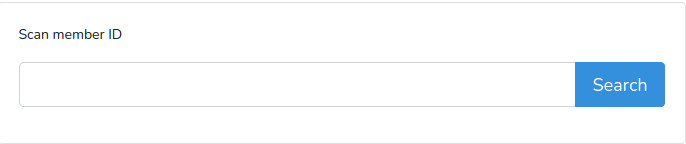
Now, let's introduce a new page to allow the cashier to enter the member ID. For the best of cashier's experience, we'll use http://www.example.com (the root path) to load this page. Let's create a public/index.blade.php file.
    <!-- public/index.blade.php -->
    <div class="card">
        <div class="card-body">
            @if(session()->has('errorMessage'))
            <p class="alert alert-danger">{{ session('errorMessage') }}</p>
            @endif
            <form action="{{ route('public.scan') }}">
                <div class="form-group">
                    <label for="memberIdInput">Scan Member ID</label>
                    <div class="input-group">
                        <input type="text" class="form-control form-control-lg" id="memberIdInput" name="memberId">
                        <div class="input-group-append">
                            <button class="btn btn-primary btn-lg">Search</button>
                        </div>
                    </div>
                </div>
            </form>
        </div>
    <div&>
Explanation:
- The form consists of a simple input field for the cashier to key in member ID, with the field name as
name="memberId". - We've used
{{ session('errorMessage') }}to show the error message when there is no member found. This variable will be passed by the controller function later. - Note that we've used the Bootstrap's input group styling.
Let's create a new controller to manage all cashier's functionality. We'll name it PublicController, and create the first function to render this form.
    /* app/Http/Controllers/PublicController.php */
    public function index()
    {
        return view('public.index');
    }
We'll also need another function to render the result page.
    /* app/Http/Controllers/PublicController.php */
    public function scan(Request $request)
    {
        $memberId = $request->memberId;

        $member = Member::find($memberId);

        if ($member) {
            return view('members.show')
                ->with([
                    'member' => $member
                ]);
        } else {
            session()->flash('errorMessage', __('Member not found.'));
            return redirect()->back();
        }
    }
Explanation:
- The
$request->memberIdrefers to the memberId field data passed by the form that cashier submitted. - We can directly retrieve the data using the
Member::find($memberId). - If the member is found, we'll load the member's information by reusing the Member Detail
view('members.show')that we've created in earlier post. - If member is not found, we'll redirect user back to the form page, and show the error message via the session flashed data
session('errorMessage').
Note
I'm using word "scan" as I assume the cashier will be entering the member ID by scanning some kind of ID card using barcode scanner in actual implementation.
And of course, we have to define the routes for route('public.index') and route('public.scan').
    /* routes/web.php */
    Route::get('/', [App\Http\Controllers\PublicController::class, 'index'])->name('public.index');
    Route::get('/scan', [App\Http\Controllers\PublicController::class, 'scan'])->name('public.scan');
Search a member
Let's test out whether the search function is working. Let's load the form page at http://www.example.com.
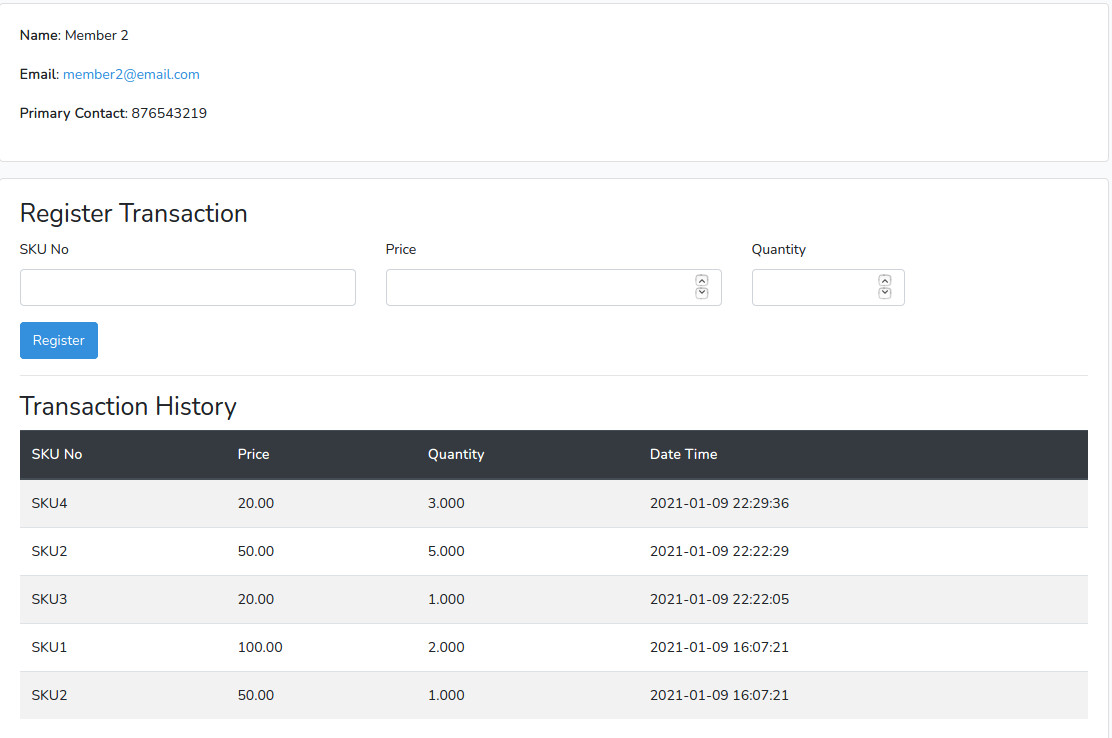
Assuming we're searching for a member of ID=2, Enter "2" into the search bar, then hit Enter or click on the "Search" button.
The browser should redirect to http://www.example.com/scan?memberId=2, and it should show the same UI as the member detail page.
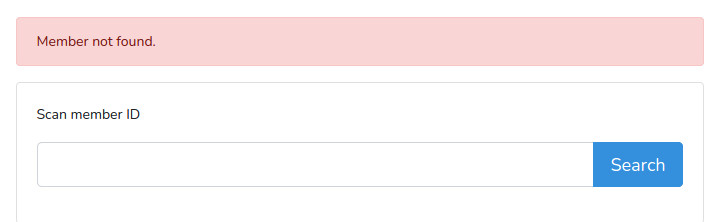
Member not found
Now, go back to the form and search for "abc". Since there is no such member with such ID="abc", the system cannot find any record and it should display the error message.
That's pretty much a basic feature for a cashier to search for a member using Member ID. Let's move on to enhance the transaction registration function.
2 - Multiple Transactions Registration
Currently, the transaction form only allow cashier to enter one record at a time. Let's create a dynamic form that allow cashier to add more fields to register multiple transactions in one go.
Note
JavaScript has been a powerful programming language that allows frontend developers to introduce more and more interactive user interface onto the browser. ReactJS is one of the few famous JavaScript frameworks that allows developers to create highly dynamic and interactive application.
Creating ReactJS Component
Let's create a ReactJS component: DynamicField at resources/js/components/DynamicField.js
    /* resources/js/components/DynamicField.js */
    import React from "react";
    import ReactDOM from "react-dom";

    export default class DynamicField extends React.Component {
        constructor(props) {
            super(props);
        }

        render() {
            return (
                <div>
                    <div className="row">
                        <div className="col-md-5">
                            <div className="form-group">
                            <label htmlFor="skuNo">SKU No</label>
                                <input
                                className="form-control"
                                id="skuNo"
                                name="sku_no[]"
                                />
                            </div>
                        </div>
                        <div className="col-md-5">
                            <div className="form-group">
                                <label htmlFor="price">Price</label>
                                <div className="input-group">
                                    <div className="input-group-prepend">
                                        <div className="input-group-text">MYR</div>
                                    </div>
                                    <input
                                        className="form-control"
                                        id="price"
                                        name="price[]"
                                        type="number"
                                        step="0.01"
                                        min="0"
                                    />
                                </div>
                            </div>
                        </div>
                        <div className="col-md-2">
                            <div className="form-group">
                                <label htmlFor="quantity">Quantity</label>
                                <div className="input-group">
                                    <input
                                        className="form-control"
                                        id="quantity"
                                        name="quantity[]"
                                        type="number"
                                        step="0.01"
                                        min="0"
                                    />
                                    <div className="input-group-append">
                                        <div className="input-group-text">pcs</div>
                                    </div>
                                </div>
                            </div>
                        </div>
                    </div>
                    <div className="text-center mt-3">
                        <button className="btn btn-outline-primary" type="button">Add field</button>
                    </div>
                </div>
            )
        }
    }
    if (document.getElementById('dynamicField')) {
       ReactDOM.render(<DynamicField />, document.getElementById('dynamicField'));
    }
Explanation:
- The
render()is a ReactJS function to render the DOM onto browser. The syntax used this function is pretty similar to HTML, which is called JSX (JavaScript XML). - We've just converted the HTML code from the members/show.blade.php into this React component, with an addition of "Add field" button after the input fields.
- In each field name, there is an additional square bracket
name="sku_no[]",name="price[]"andname="quantity[]". These represent that sku_no, price, and name will be arrays when the data are submitted to the backend. - At last part, we've used
ReactDOM.render()to render this component in the HTML element withid="dynamicField".
Note
This component is not fully completed yet, we still have a lot more to work on. Follow through the steps to go with the flow to understand some basic of ReactJS before we finalise with the dynamic adding field feature.
The ReactJS component will not work until we compile it. In order to do so, we have to include this component into the main entry file, resources/js/app.js.
    /* resources/js/app.js */
    require('./components/DynamicField.js');
Now we have to use NodeJS to compile by the following command:
npm run prod
Note
We have to run this command everytime we change the frontend files (JavaScript or CSS). Alternatively, we can simply run npm run watch during the development, where NodeJS will automatically be triggered to compile the assets whenever the frontend file changes are saved.
The command will run the script as defined in the package.json, which is using Webpack to bundle all the dependencies. The Webpack configuration is defined in webpack.mix.js.
After the compilation, the bundled JavaScript will be placed in public/js/app.js. We need to ensure this file is loaded in the HTML.
    <!-- resources/views/layouts/app.blade.php -->
    <head>
        ...
        <script src="{{ asset('js/app.js') }}" defer></script>
        ...
    </head>
Note
When we use laravel/ui package to generate the boilerplate, it should have automatically embedded this script in the <head> section of the HTML in resources/views/layouts/app.blade.php.
And now, we have to update the members/show.blade.php file:
    <!-- resources/views/members/show.blade.php -->
    <form action="{{ route('members.addTransactions', $member) }}" method="post">
        @if(session()->has('successMessage'))
            <p class="alert alert-success">{{ session('successMessage') }}</p>
        @endif
        @if(session()->has('errorMessage'))
            <p class="alert alert-warning">{{ session('errorMessage') }}</p>
        @endif
        @csrf
        <div id="dynamicField"></div>
        <button type="submit" class="btn btn-primary">Register</button>
    </form>
Explanation:
- We've replaced the entire chunk of HTML in the form with one line of
<div id="dynamicField"></div>. This is where the ReactJS component will be rendered. - Note that we've also updated the action to
{{ route('members.addTransactions', $member) }}(addition of "s" before theaddTransactions), which we will define the later. - We've also added
session('successMessage')andsession('errorMessage')to render any session flash message passed back from controller.
Let's add the new route into our routes/web.php first, then refresh the page.
Route::post('members/{member}/add-transactions', [App\Http\Controllers\MemberController::class, 'addTransactions'])->name('members.addTransactions');
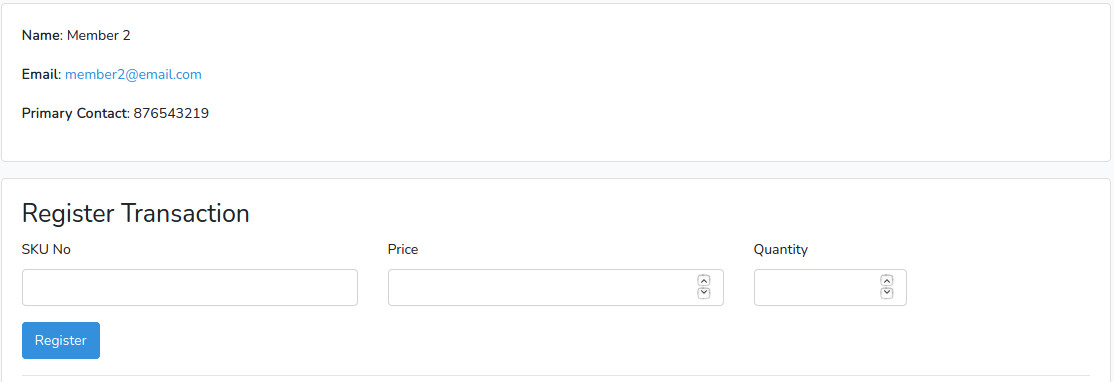
We should now see the transaction registration form with an additional "Add Field" button below the form.

Adding Interaction
As of now, the "Add Field" button is not responsive yet, because we have not bound any function when user click on it.
Let's go back to resources/js/components/DynamicField.js, and we'll update our DynamicField class to the following:
    /* resources/js/components/DynamicField.js */
    export default class DynamicField extends React.Component {
        constructor(props) {
            super(props);
            this.state = {
                items: [
                    {
                        id: "item1",
                        skuNo: "",
                        price: 0,
                        quantity: 1,
                    }
                ]
            }
        }

        handleOnClick(e) {
            e.preventDefault();
            this.addField();
        }

        addField() {
            e.preventDefault();
            let items = this.state.items;
            this.setState({
                items: [
                    ...items,
                    {
                        id: `item${items.length + 1}`,
                        skuNo: "",
                        price: 0,
                        quantity: 1
                    }
                ]
            });
        }

        render() {
            return (
                <>
                    <div className="list-group">
                        {
                            this.state.items.map((item, index) => {
                                return (
                                    <div className="list-group-item" key={item.id}>
                                        <div className="row">
                                            <div className="col-md-5">
                                                <div className="form-group">
                                                <label htmlFor={`skuNo${index + 1}`}>SKU No</label>
                                                    <input
                                                        className="form-control"
                                                        id={`skuNo${index + 1}`}
                                                        name="sku_no[]"
                                                    />
                                                </div>
                                            </div>
                                            <div className="col-md-5">
                                                <div className="form-group">
                                                    <label htmlFor={`price${index + 1}`}>Price</label>
                                                    <div className="input-group">
                                                        <div className="input-group-prepend">
                                                            <div className="input-group-text">MYR</div>
                                                        </div>
                                                        <input
                                                            className="form-control"
                                                            id={`price${index + 1}`}
                                                            name="price[]"
                                                            type="number"
                                                            step="0.01"
                                                            min="0"
                                                        />
                                                    </div>
                                                </div>
                                            </div>
                                            <div className="col-md-2">
                                                <div className="form-group">
                                                    <label htmlFor={`quantity${index + 1}`}>Quantity</label>
                                                    <div className="input-group">
                                                        <input
                                                            className="form-control"
                                                            id={`quantity${index + 1}`}
                                                            name="quantity[]"
                                                            type="number"
                                                            step="0.01"
                                                            min="0"
                                                        />
                                                        <div className="input-group-append">
                                                            <div className="input-group-text">pcs</div>
                                                        </div>
                                                    </div>
                                                </div>
                                            </div>
                                        </div>
                                    </div>
                                );
                            });
                        }
                    </div>
                    <div className="text-center mt-3">
                        <button className="btn btn-outline-primary" type="button" onClick={(e) => this.handleOnClick(e)}">Add field</button>
                    </div>
                </>
            )
        }
    }
Explanation:
- We've updated the
render()function, where it usesmap()to loop through thethis.state.fieldsand return the JSX. - When user click on the "Add field" button, its "onClick" event listener will trigger the
handleOnClick()function, which will calladdField()method, which append a new field state into thethis.state.fields. - Note that the state of this component has been initialised in the
constructor()with one field by default.
Now it's time to try out the "Add field" button. Don't forget, make sure the compilation was run after the code changes. (It should be done automatically if you have run npm run watch earlier.) Make sure to refresh the page to test out the updated JavaScript.
Storing multiple transactions
We've done with the interactive UI. Now it's time to update the backend function to take in multiple transactions data. As of now, our backend function only able to handle single transaction.
Earlier on, we've replaced the form's action to route('members.addTransactions'), which is pointing to the 'MemberController@addTransactions' function. Let's define this function.
    /* app/Http/Controllers/MemberController.php */
    public function addTransactions(Request $request, Member $member)
    {
        $requestData = $request->all();

        if ($member) {
            $transactions = [];

            foreach($requestData['sku_no'] as $key => $skuNo) {
                $transaction = new Transaction([
                    'sku_no' => $requestData['sku_no'][$key],
                    'price' => $requestData['price'][$key],
                    'quantity' => $requestData['quantity'][$key],
                    'date_time' => Carbon::now(),
                ]);

                array_push($transactions, $transaction);
            }

            $member->transactions()->saveMany($transactions);

            session()->flash('successMessage', 'Transaction successful');
        } else {
            session()->flash('errorMessage', 'Member not found.');
        }

        return redirect()->back();
    }
Explanation:
- As usual, the function will take in the type-hinted
Request $requestandMember $memberwhen user submit the form. - As oppose to the single transaction registration function defined in
addTransaction(), this function will loop through each value of the array, create new Transaction, then push into the$transactionsarray. - We've passed the
$transactionsarray into the EloquentsaveMany()method, which will be inserted as related models to the$member. - We've also added the
session('successMessage')andsession('errorMessage')accordingly.
Let's try to add multiple transactions using the form earlier, and click "Register" button to see the effect. The latest transactions should be added with the same timestamp in the Transaction History table below.
Conclusion
Yup! We've slightly enhanced the user experience of the system, by introducing the search member function and multiple transactions registration features. Hopefully, this will slightly make our cashier's life slightly better. :-)
Next step...
Since we've introduced a very basic Member Search function by ID. In next post, we'll enhance this search function to be more powerful by having keyword search, which allow cashier to search by using other member's information. Stay tuned.